F1 Downforce and Tyre Wear Guide
Explains how aero balance, load, sliding and heat determine F1 tyre wear, plus signs, stint checks and setup choices.
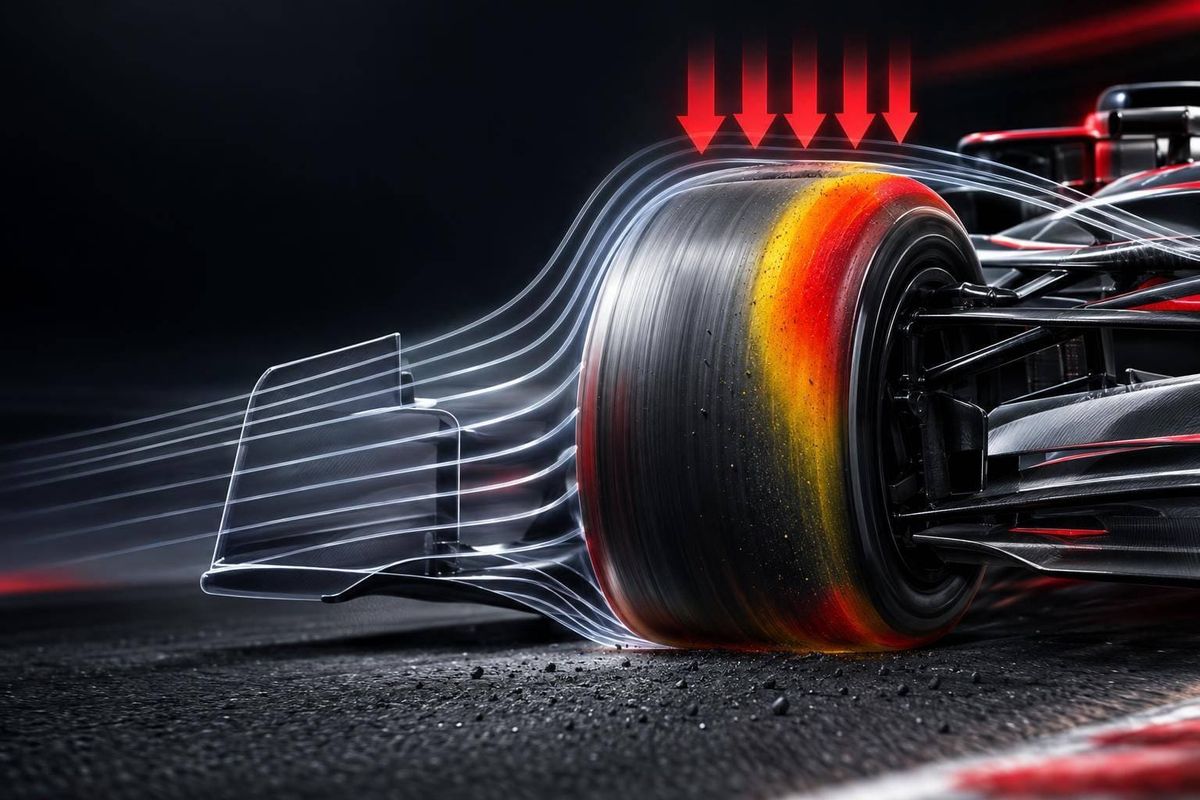
More downforce doesn’t always mean longer tire life. I look at two things first: which axle loses grip and whether the tires are sliding or overheating. Extra load can reduce sliding, but it also adds heat - even when the car looks settled.
Here’s how I connect aero setup to tire performance:
- Load and balance: Downforce grows roughly with speed squared. Its front-to-rear split, ride height, and 2026 movable wing modes affect how much support each axle gets.
- Heat and damage: Compound, pressure, track conditions, and traffic affect tire temperature. Grip loss isn’t always rubber loss: graining may clear, while blistering usually leaves lasting damage.
- Stint changes: Fuel burn can hide fading grip in steady lap times. I compare similar laps and corners rather than judging by tire age alone.
- What to watch: I check steering corrections, lockups, wheelspin, radio reports, and pace in clean air. Then I assess whether gentler inputs, cockpit settings, or a pit stop could help.
My rule of thumb: <u>judge tire life by load, sliding, and heat together - not downforce alone.</u>
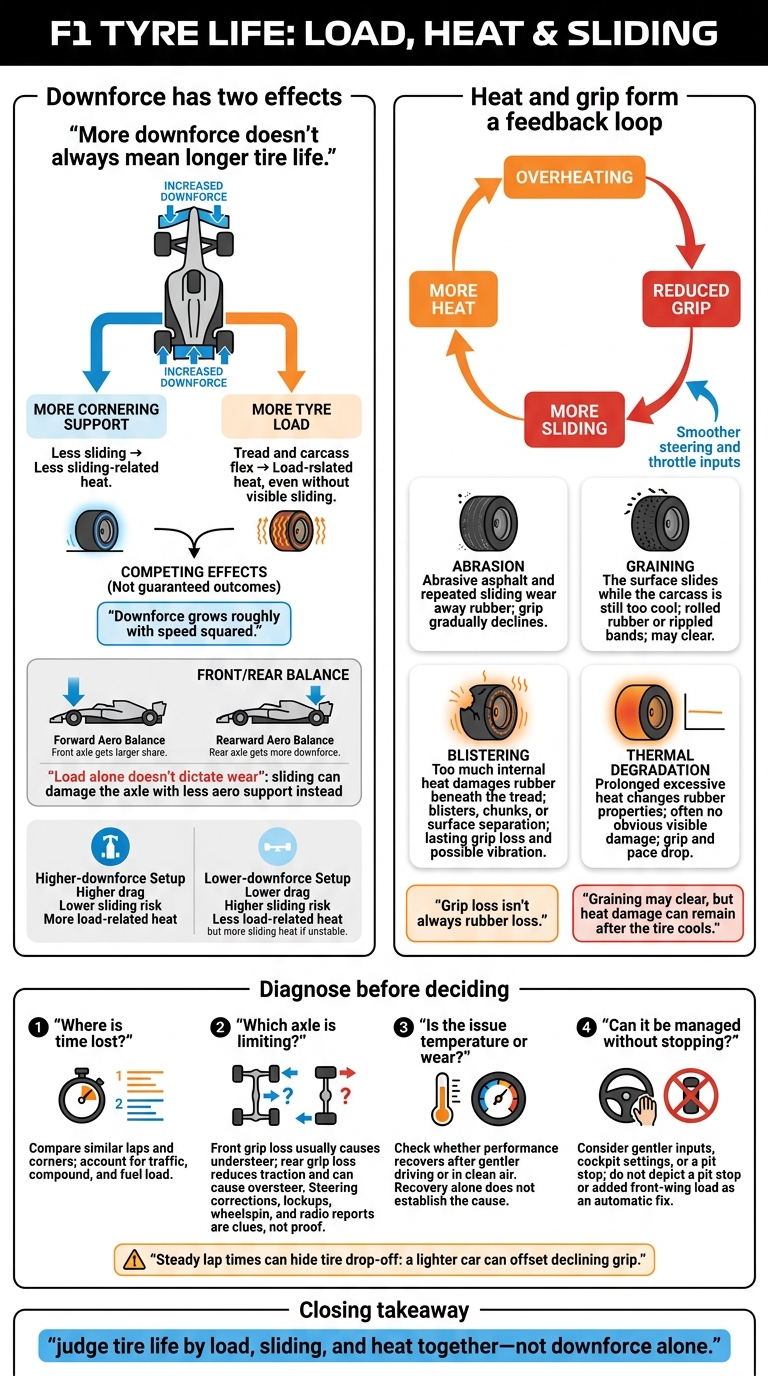
F1 Downforce, Heat and Tyre Wear Explained
Tyre wear in F1 explained
sbb-itb-7c68254
How Aero Balance Distributes Tire Loads
Aero load reaches the tires through the chassis and suspension. But which axle carries that load matters as much as the total amount.
Aero surfaces (front wing, floor, rear wing)
              ↓
       Chassis and aero mounts
              ↓
       Suspension linkages
  (pushrods/pullrods, springs, dampers)
              ↓
          Wheel uprights
              ↓
           Wheel rims
              ↓
          Tire carcass
              ↓
        Contact patch → Track
Once the car generates downforce, the next question is how much reaches the front tires versus the rear tires.
Front-to-Rear Aero Balance
Aero balance describes the front-to-rear split of downforce, defined by the center of pressure. Move it forward, and the front axle gets a larger share. Move it rearward, and the rear axle gets more. The best split depends on speed, the car’s mechanical balance, driver preference, and track demands.
| Aero loading | Turn-in | Stability | Traction | Main tire risk | Driver feedback |
|---|---|---|---|---|---|
| Forward | Sharp, aggressive | Oversteer-prone | Poor if rear slips | Front graining or rear overheating from slip | Sharp front end; prone to oversteer |
| Balanced | Neutral | Predictable | Stable | Potentially more even wear | Consistent; easiest to manage |
| Rearward | Slow to turn in | Greater rear stability | Stronger at speed | Front graining from understeer or rear overheating under load | Mid-corner understeer |
A forward balance can overwork the front tires, while a rearward balance can overheat the rears. But load alone doesn’t dictate wear: sliding can damage the axle with less aero support instead.
Load Transfer and Ride Height
Braking shifts load toward the front tires, while cornering loads the outside tires. Mechanical load transfer moves existing load around - it doesn’t create downforce.
Pitch and roll also change the floor’s distance and angle to the track. That can alter both total downforce and its front-to-rear split. Ground-effect floors are highly sensitive to pitch and ride height, so suspension affects tire load through both mechanical forces and aerodynamics.
This helps explain why the same car can look stable in one corner, then start overheating one axle in the next.
Wing Settings: Grip vs. Drag
A baseline wing setup balances support in corners against straight-line efficiency.
More wing reduces sliding but adds tire load. Less wing cuts aero load, but the extra slip can cancel out that benefit.
| Effect | Higher-downforce setup | Lower-downforce setup |
|---|---|---|
| Cornering stability | High | Lower |
| Drag | Higher | Lower |
| Sliding risk | Lower | Higher |
| Tire heating | More load-related heat | Less load-related heat, but more sliding heat if the car is unstable |
For 2026, movable front and rear wings add high-downforce cornering and low-drag straight-line modes. Tire loading can therefore change within a lap.
How Tires Heat Up and Take Damage
Heat from Tire Load and Sliding
As the tread and carcass flex during cornering, braking, and acceleration, they convert energy into heat. Sliding friction adds heat at the surface. A little slip helps tires generate force, but too much cornering slip, wheelspin, or locking up wastes energy and damages rubber. A heavily loaded tire can heat up even without visible sliding.
More grip can also mean more heat if the driver uses it to carry more speed. Once overheating cuts grip, a damaging cycle can follow: more sliding creates more heat, which leaves even less grip. Smoother steering and throttle inputs help interrupt that cycle without making the driver slow down everywhere. Too much heat and sliding can cause abrasion, graining, or blistering.
Signs of Wear, Graining, and Blistering
| Condition | Typical conditions | Visible or reported signs | Handling effect | Possible response |
|---|---|---|---|---|
| Abrasion | Abrasive asphalt and repeated sliding wear away rubber | Rough tread or rubber loss | Grip gradually declines | Reduce sliding; manage pace or pit |
| Graining | The surface slides while the carcass is still too cool | Rolled rubber or rippled bands | Uneven grip; understeer or oversteer | Warm the tire gradually |
| Blistering | Too much internal heat damages rubber beneath the tread | Blisters, chunks, or surface separation | Lasting grip loss; possible vibration | Reduce tire energy; consider a tire change |
| Thermal degradation | Prolonged excessive heat changes rubber properties | Often no obvious visible damage | Grip and pace drop | Reduce energy input; reconsider pace or strategy |
Graining may clear, but heat damage can remain after the tire cools. A brief loss of grip followed by recovery can point to graining, though it doesn't prove the cause. Broadcast pictures aren't enough to diagnose it reliably, either. Check tire age, sector losses, driver feedback, and whether performance recovers before drawing a conclusion.
Compound, Track Conditions, and Dirty Air
Compound choice, pressure, asphalt roughness, and fuel load all affect tire heating. Softer rubber can provide more grip at first but reach its heat limits sooner. Harder rubber may take more work to warm up. Rough asphalt increases abrasion, and heavier fuel loads put more demand on the tires.
Pressure changes both tire shape and heat generation, so adjusting it isn't a simple fix. Air temperature affects the car, while track temperature has a more direct effect on surface heating.
Dirty air can reduce front-end support, forcing the driver to add steering and take broader lines that heat the front tires. Modeling reported by Motorsport.com estimated about a 47% downforce loss 33 feet (10 meters) behind a 2021-spec car, compared with about 18% in incoming-regulation modeling.
When a following driver develops understeer, check whether it gets worse in traffic and improves in cleaner air before blaming the compound alone. That overheating can change the car's balance later in the stint, even when the early laps looked stable.
How Tire Balance Changes During a Stint
Fuel Burn and Front or Rear Grip Loss
Heat and balance change together throughout a stint. Burning fuel makes the car lighter, shifting tire loads and handling balance. Ride height and pitch change too, moving the aero balance between the front and rear over successive laps. Steady lap times can hide tire drop-off: a lighter car can offset declining grip. Front tire wear usually causes understeer, while rear wear cuts traction and can lead to oversteer.
Even a stable car can move outside its working window. Wind, track temperature, rubber buildup, and traffic can change which axle limits pace, leading to more sliding and overheating. Compare similar corners before and after traffic: a brief balance shift alone doesn’t prove tire damage.
Driver Techniques and Team Adjustments
Once the driver and team identify the limiting axle, small setup and driving changes can help. If the front limits grip, drivers need to reduce entry speed and steering angle. If the rear limits grip, they need cleaner exits and gentler throttle inputs. The goal is to keep the tires in their working window without losing more time later. Giving up some peak speed can prevent sliding that costs more time toward the end of the stint.
Drivers can change brake balance, differential settings, and energy deployment from the cockpit. During a pit stop, teams can adjust the front-wing angle using existing parts, but they cannot add, remove, or replace parts. More front-wing load may reduce understeer, yet expose a weakness at the rear. It isn’t a guaranteed fix. Event and parc fermé rules still restrict suspension changes, and tire pressures must meet FIA and supplier requirements.
Reading Stint Lap Times
To spot balance changes as they happen, read lap-time patterns alongside race conditions. Plot lap time against lap number, including compound, tire age, traffic, pit stops, safety-car and virtual-safety-car periods, yellow flags, radio notes, and track evolution. Also note wind changes and DRS availability where the event’s rules allow it.
Keep confirmed data separate from interpretation. Add clearly labeled fuel corrections or tire-temperature traces only when the inputs are reliable. If fuel correction isn’t available, say so. Look for repeated handling and pace patterns across representative laps - not isolated laps - to link changing aero load and balance with tire performance.
Race-Watching Checklist
Use live timing and radio to check the balance shifts and tire effects covered in the stint analysis.
Spot Where the Car Loses Time
Compare corner types within each sector - not just the sector total. Before using teammate gaps, account for tire compound, traffic, and fuel load. Repeated steering corrections suggest the car has reached a grip limit. The table links each symptom to a possible cause.
| Signal | Possible cause | What else to check |
|---|---|---|
| Missed apexes or extra steering lock in fast corners | Reduced front downforce or unstable aero balance | Does it happen mainly in high-speed corners or dirty air? |
| Front lockups under braking | Aero balance shifting forward or overloaded front tires | Are the lockups repeated? Driver error may also play a part. |
| Rear wheelspin or exit corrections | Rear aero instability or rear tire overheating | Is it worse on high-speed exits than low-speed exits? |
| Pace loss when following another car closely | Disturbed airflow, extra sliding, and heat buildup | Do the same corners improve once the driver reaches clean air? |
Radio often confirms what timing shows first.
Read Radio Reports and Pit-Stop Choices
Treat reports of sliding, graining, or front-end grip loss as clues to check against timing. If pace returns after the driver backs off, temporary overheating is likely - but not proven. Graining can clear; a loss that persists points to a lasting problem.
An early stop can provide more grip from new tires or improve track position, but traffic can bring back the same issue. Before blaming worn tires, check whether pace recovers in clean air and whether the front or rear grip limit remains.
Conclusion: Grip, Heat, and Tire Life
Downforce adds grip, while tire loading and sliding generate heat. Aero balance helps determine which axle overheats or slides first. Stable downforce matters more for tire management than peak downforce alone: cars that look settled and need fewer corrections usually treat their tires more gently.
- Where is time lost?
- Which axle is limiting?
- Is the issue temperature or wear?
- Can it be managed without stopping?
FAQs
Why can identical downforce produce different tire wear?
The same downforce can lead to different tire wear. Tire load is only part of the picture. Downforce presses the tires harder against the track, adding grip but also speeding up wear.
Even small shifts in ride height or airflow can disrupt ground effect. That changes grip and how hard the tires have to work. Track conditions, corner demands, dirty air, and tires running too hot or too cold also affect degradation - even when nominal downforce stays the same.
How can fans distinguish overheating from permanent tire damage?
Track lap times and listen to driver feedback. Temporary overheating reduces grip, but drivers can cool the tires by lifting and coasting or changing their racing line. Once the tires cool, pace may recover.
Permanent damage, such as blistering or excessive degradation, leads to a lasting loss of performance. If cooling the tires doesn’t stabilize lap times, they may be damaged and need replacing during a pit stop.
When is managing tire wear faster than pitting?
Managing tire wear is faster than pitting when the expected time lost from tire degradation is less than the combined time lost in the pit lane and through losing track position.
To judge whether a driver can stay competitive on aging tires, teams track lap-time loss, brake pressure consistency, and cornering smoothness. They also monitor tire temperatures, pressures, and wear rates in real time.