F1 Tire Rules Checklist for Race Analysis
Six-point checklist to judge F1 tire calls: compounds, track heat, set inventory, pit loss, degradation, and safety-car risk.
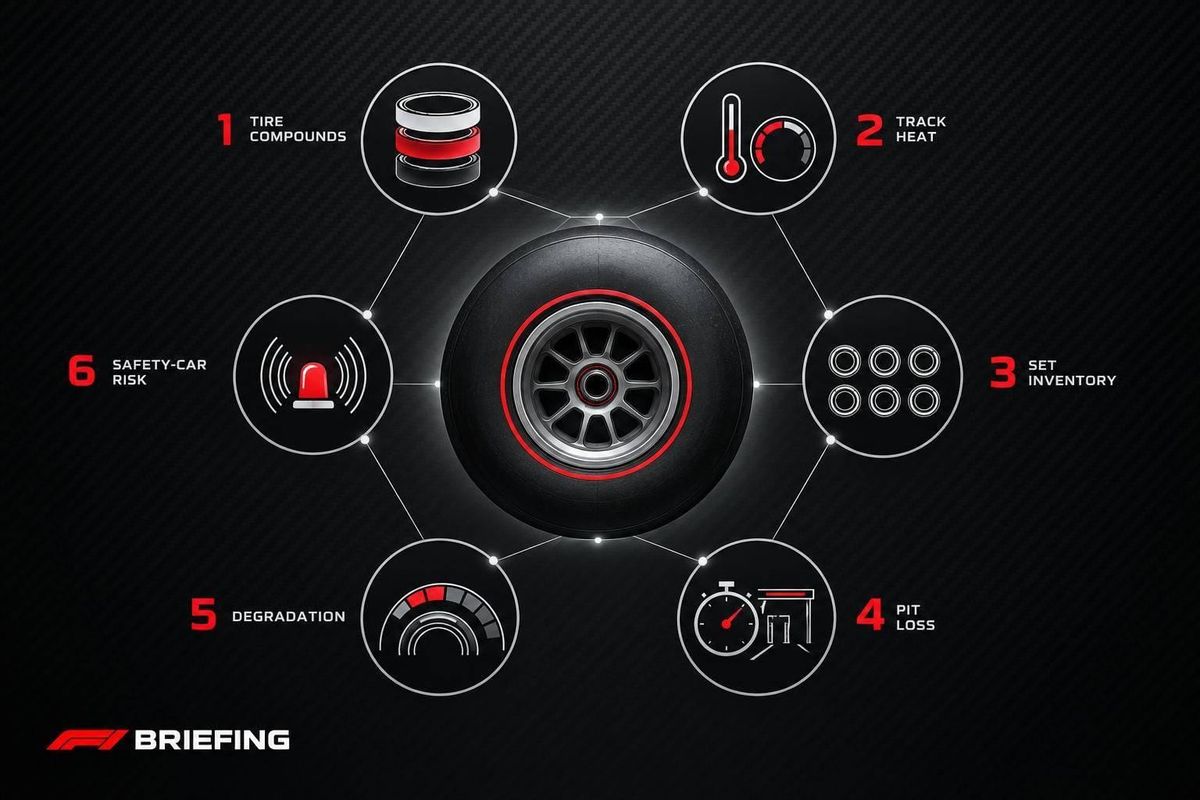
I check six things before judging an F1 tire call: compounds, track heat, available sets, pit loss, degradation, and safety-car risk. Start with the current FIA event rules and Pirelli’s tire choices - not the previous race’s rules.
Here’s my checklist:
- Compounds: Confirm the Hard, Medium, and Soft choices, required tire use, and any special rules.
- Track heat: Record temperatures in °F and note rain, surface conditions, and tire loads.
- Available sets: Count eligible new and used tires after required returns.
- Pit loss: Estimate time lost, out-lap warm-up, and where the driver will rejoin.
- Degradation: Use clean laps to estimate pace loss and stint-length ranges.
- Safety-car risk: Recheck the plan when a neutralization or weather change alters the cost of stopping.
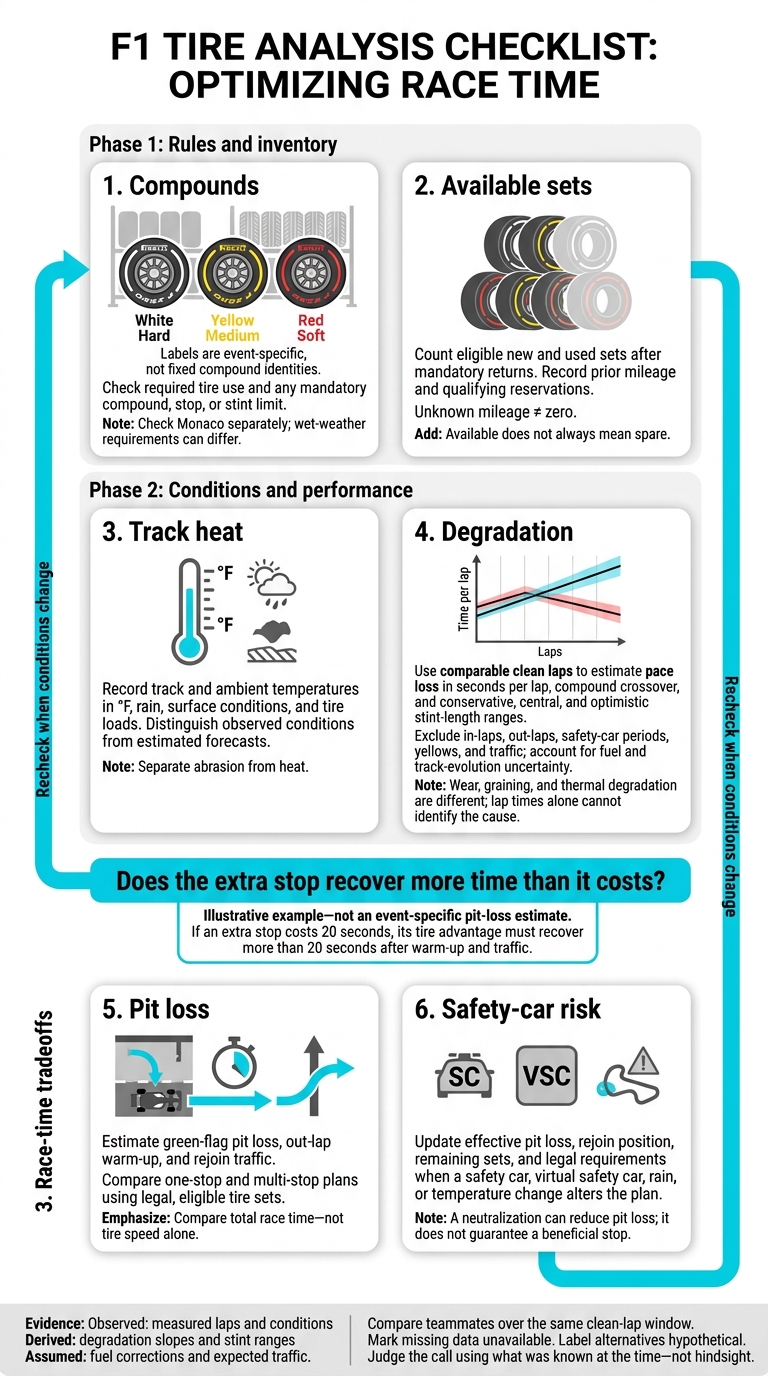
I keep measured facts separate from estimates and compare teammates over the same clean-lap window. <u>The test is total race time - not tire speed alone.</u> For example, if an extra stop costs 20 seconds, its tire advantage must recover more than 20 seconds after warm-up and traffic. I judge that choice using what was known at the time, not hindsight.
F1 Tire Strategy: Six-Point Race Analysis Checklist
1. Check Event Rules and Tire Availability
Check Compound Choices and Required Tire Use
Start with the official event file. Record the current slick range and match each nominated compound to its race-weekend label: white Hard, yellow Medium, red Soft. These labels apply to that event; they aren't fixed compound identities.
For a dry race, check whether drivers must use at least two different slick compounds. Then check for event-specific requirements, such as a mandatory dry compound, pit stop, or stint limit. Monaco has separate requirements, so don't assume the same dry-race rules apply there. Log intermediate and full-wet use separately. Wet-weather conditions can change how the dry-compound requirement applies and may make wet tires compulsory.
Check Tire Allocations and Required Returns
Record the weekend type first. Standard weekends start with 13 slick sets: two Hard, three Medium, and eight Soft, plus five intermediate and two full-wet sets. Sprint weekends start with 12 slick sets: two Hard, four Medium, and six Soft, plus six intermediate and two full-wet sets.
Subtract mandatory returns before counting sets available for the race. Also check which sets are reserved for qualifying. Sprint Qualifying allows up to one new Medium set in each of SQ1 and SQ2, and up to one new Soft set in SQ3.
Build Each Driver’s Tire Inventory
Create a tire log for each driver using verified allocations and mileage. Count only sets eligible after required returns - not every tire still on hand. Match each available set to its likely race use or a constraint on when it can be used.
| Driver | Compound and label | Eligible set count | New or used | Prior mileage | Likely race use / reservation |
|---|---|---|---|---|---|
| Driver | Nominated slick code + Hard, Medium, or Soft | After returns | By set | Known or unknown | Opening stint, final stint, or restart |
| Driver | Intermediate | After wet-session additions and returns | By set | Known or unknown | Intermediate contingency |
| Driver | Full wet | Current availability | By set | Known or unknown | Full-wet contingency |
Record mileage in miles, with km in parentheses, using miles = kilometers × 0.621371. Mark unknown mileage as unknown, not zero. Unless the team confirms a reservation, label it as an analyst estimate. A legally available set isn't always a spare: it may be the driver's only suitable option for the final stint or a change in weather.
Use this inventory as the baseline for heat and degradation checks.
sbb-itb-7c68254
2. Assess Track Heat and Tire Degradation
Record Temperatures, Surface Conditions, and Tire Loads
Log track and ambient temperatures in °F. Convert source readings with °F = (°C × 9/5) + 32. Include session time, humidity, cloud cover, wind, rain risk, and whether the surface is drying or cooling. Label practice readings as observed and race-day forecasts as estimated. This gives you a baseline for tire degradation and helps judge whether a compound will last or fade early.
Separate abrasion from heat. Rough asphalt wears away rubber, braking loads the fronts, acceleration stresses the rears, and long corners build temperature. Extra grip can also hide degradation.
Estimate Pace Loss and Crossover Point
Plot adjusted lap time against tire age using clean long-run laps. Exclude in-laps, out-laps, safety-car periods, yellows, traffic, and noise from fuel loads or track evolution. Divide adjusted time loss by laps elapsed to estimate seconds per lap, then report a range. Compare early-, middle-, and late-stint slopes rather than assuming degradation stays constant. Unknown fuel loads or just one clean run should reduce confidence in the estimate.
Keep three causes separate: wear means losing usable rubber; graining means small rolls of rubber forming through sliding; and thermal degradation means losing performance through overheating and repeated sliding. Graining can clear up. If losses persist or accelerate, check sector losses, driver feedback, and any available temperature data. Lap times alone cannot tell you the cause.
Estimate the crossover point where the adjusted pace curves for two compounds meet, accounting for warm-up. One faster lap on a harder tire does not prove that crossover has occurred. Use the degradation slope to set stint-length ranges and possible pit windows - not one fixed number.
Estimate Stint-Length Ranges
Give conservative, central, and optimistic lap ranges instead of a single tire-life figure. Build the central range from comparable clean runs. Shorten it for hotter conditions, traffic, lock-ups, or whichever axle wears faster. Extend the optimistic range only when clean air, suitable temperatures, and stable balance support it.
Record whether the fronts or rears limit the stint. Understeer and front graining present different problems from wheelspin and rear overheating. Driver inputs matter too: one car’s usable stint is not a baseline for the whole field.
Keep tire life separate from its usefulness in the race plan. A set may still be legal but too slow to justify staying out. Label measured laps and conditions as observed, degradation slopes and stint ranges as derived, and fuel corrections or expected traffic as assumed. Put the biggest uncertainty beside each forecast, then carry those ranges into pit-loss analysis to assess the stop-loss tradeoff.
3. Weigh Pit Loss Against Safety-Car Risk
Calculate Green-Flag Pit Loss and Rejoin Position
Use the stint ranges from the previous check to see whether a stop can pay for itself. Once you know tire life, pit loss determines which options make sense.
Estimate the time lost during a green-flag stop. Compare that loss with the gaps to the cars behind to predict where you'll rejoin. Include out-lap warm-up: new tires help only if they reach temperature fast enough to beat the rival on track. Use live tire temperature, pressure, and wear data to assess the stop.
Compare One-Stop and Multi-Stop Plans
Compare total race time, not just compound speed. An extra stop pays off when the lap-time gain from newer or softer tires exceeds the added pit loss and time spent in traffic. Hotter, rougher tracks leave less room for an extra stop to work.
Simulate each option using the remaining tire sets and mandatory-use rules, then account for likely traffic where you'll rejoin.
- One-stop: Best when one compound can last the stint without a steep drop in tire performance.
- Multi-stop: Best when newer tires recover more time than the second stop costs.
Next, test the same plan against neutralization risk.
Update Plans for Safety Cars and Weather
Check safety-car risk last - it can turn a poor stop into the right call. Use the likelihood of a safety car or virtual safety car to help time the stop. Neutralizations can reduce effective pit loss, but the gain still depends on track position, available tire sets, and pit-entry limits.
Rain or a sharp temperature swing can force a compound change and another stop. Weigh the gain from switching compounds against the time lost to that stop.
- Start: Record the planned sequence and usable spare sets.
- Pit window: Compare stopping now with safely extending the stint.
- Neutralization: Update pit loss and the expected rejoin position.
- Final stint: Recheck remaining tire life and legal requirements if the weather is changing.
Decoding Formula 1 Tyres: Rules and Regulations Unveiled!
Conclusion: Complete the Six-Point Tire Check
Check each call against the race evidence: compound sequence, track heat, set count, pit loss, degradation, and safety-car risk. Then check it against the FIA rules and Pirelli allocation. Use the table below to separate tire effects from driver execution.
Compare teammates over the same lap window, recording these fields side by side. Mark missing data as unavailable rather than filling in assumptions.
| Comparison field | Record for each teammate |
|---|---|
| Compound | Actual specification and stint sequence |
| Tire age | Laps already completed on the fitted set |
| Fuel estimate | Labeled estimate, or unavailable |
| Traffic | Clear air, following traffic, or unavailable |
| Median clean-lap time | Median clean-lap time over the stated window |
The lap window must be clean: exclude in-laps, out-laps, yellows, and heavy traffic. Without fuel or tire-temperature data, the comparison is indicative, not definitive. Use that pace assessment to classify the outcome as rule-driven, execution-driven, or uncertain.
Label every alternative hypothetical, and state its assumed pit loss, degradation, traffic, and safety-car timing. Judge the call using what was known at the time - not hindsight.
FAQs
How can I estimate degradation without team telemetry?
Track lap times for a steady slowdown. Worsening sector times or mini-sector deltas over two or three consecutive laps often mean the tires are nearing the end of their effective life. Watch for a performance cliff: a sudden, sharp jump in lap times.
Compare your driver's pace with competitors on new tires. When your driver's current set becomes slower than a new set, that usually marks the optimal pit-stop window.
When does track position outweigh fresher tires?
Track position usually matters more when passing is difficult or tire wear is low. Even with newer tires, a driver may not gain enough speed to make up the roughly 24 seconds lost during a pit stop. On smooth, low-wear tracks or in cooler conditions, teams may choose an overcut - pitting later - to hold their position.
On tracks with high tire degradation, newer tires take priority when their pace advantage more than makes up for the time lost in the pits.
How should I weigh safety-car risk against tire wear?
Weigh track position against the grip and pace of new tires. A pit stop under a safety car usually costs less time than a green-flag stop, so it can be a good option when worn tires are close to a sharp drop in performance.
Tire temperature matters, too. Teams must account for cooling and how hard it may be to warm new tires for the restart. They use data and pre-race plans tied to lap number and tire compound to guide the call.