Chassis Design and Weight Transfer in F1
Explains how suspension geometry, stiffness and ballast control dynamic load transfer to optimize braking, traction and cornering.
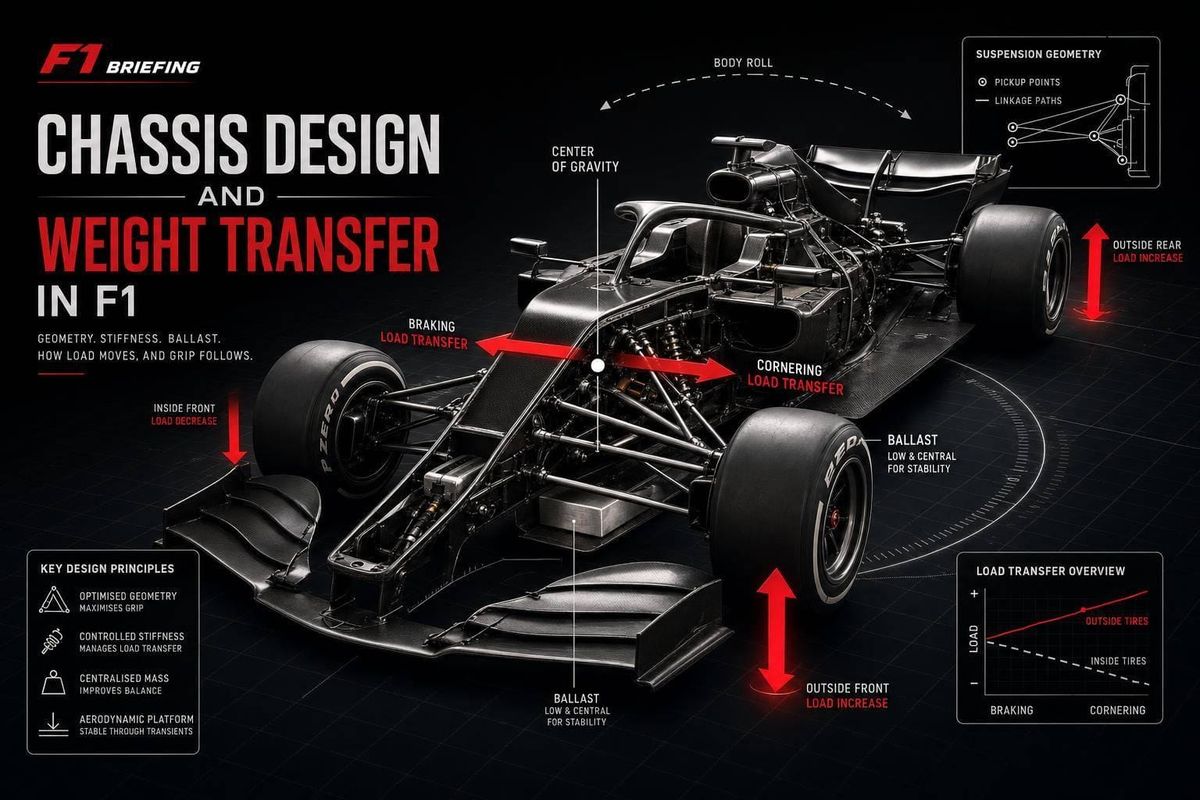
In F1, lap time often comes down to one thing: how the chassis controls load as it moves between the four tires. A car can meet the FIA minimum weight of 798 kg and still feel poor on track if braking, throttle, and cornering loads hit the tires too hard or at the wrong time.
Here’s the short version: ballast helps static balance, but suspension geometry and chassis stiffness shape dynamic balance. That means teams look at anti-dive, anti-squat, roll behavior, ride-height control, and compliance to keep the car stable under braking, calm on exit, and settled in fast corners. In ground-effect F1 cars, even a few millimeters of pitch can hurt floor performance and cut grip.
If I boil the article down, these are the main takeaways:
- Static weight distribution is only the starting point.
- Dynamic load transfer decides braking stability, traction, and mid-corner balance.
- Ballast movement is limited by rules and packaging.
- Suspension geometry does most of the work once the car is moving.
- Stiffness does not change total weight transfer, but it changes how fast load reaches the tires.
- Setup is always a trade-off: fix entry, and you may hurt exit; calm the rear, and you may lose rotation.
A recent case shows that trade-off well. In May 2026, Mercedes tried a rear suspension update on the W16 to steady the aero platform under braking. It helped in heavy braking zones, including Canada, but it became tougher in long corners and during brake-and-turn phases. By June 2026, the team went back to the older version.
Quick view of what each chassis lever affects:
| Chassis lever | Main effect on the car | What you usually see on track |
|---|---|---|
| Ballast / static balance | Baseline front-to-rear load | Entry feel, lockup risk, traction feel |
| Anti-dive | Limits front pitch under braking | Less nose drop, steadier braking platform |
| Anti-squat | Shapes rear load build on throttle | Smoother traction or wheelspin on exit |
| Roll / lateral load control | Changes outside-tire loading in corners | Mid-corner understeer or snap oversteer |
| Stiffness / compliance | Changes how sharply loads hit the tires | Better aero platform or harsher curb response |
So if I’m reading car behavior trackside, I’d keep it simple:
- Nose diving under braking? Front axle or aero platform issue.
- Wheelspin on exit? Rear load may be building too fast.
- Push in fast corners or sudden rear step-out? Lateral load transfer is out of balance.
- Tire wear climbing after a few laps? The load pattern is likely too harsh.
That’s the core idea of the article: F1 chassis design is not about stopping weight transfer. It’s about controlling when, where, and how fast it happens so the tires stay in their grip window for as much of the lap as possible.
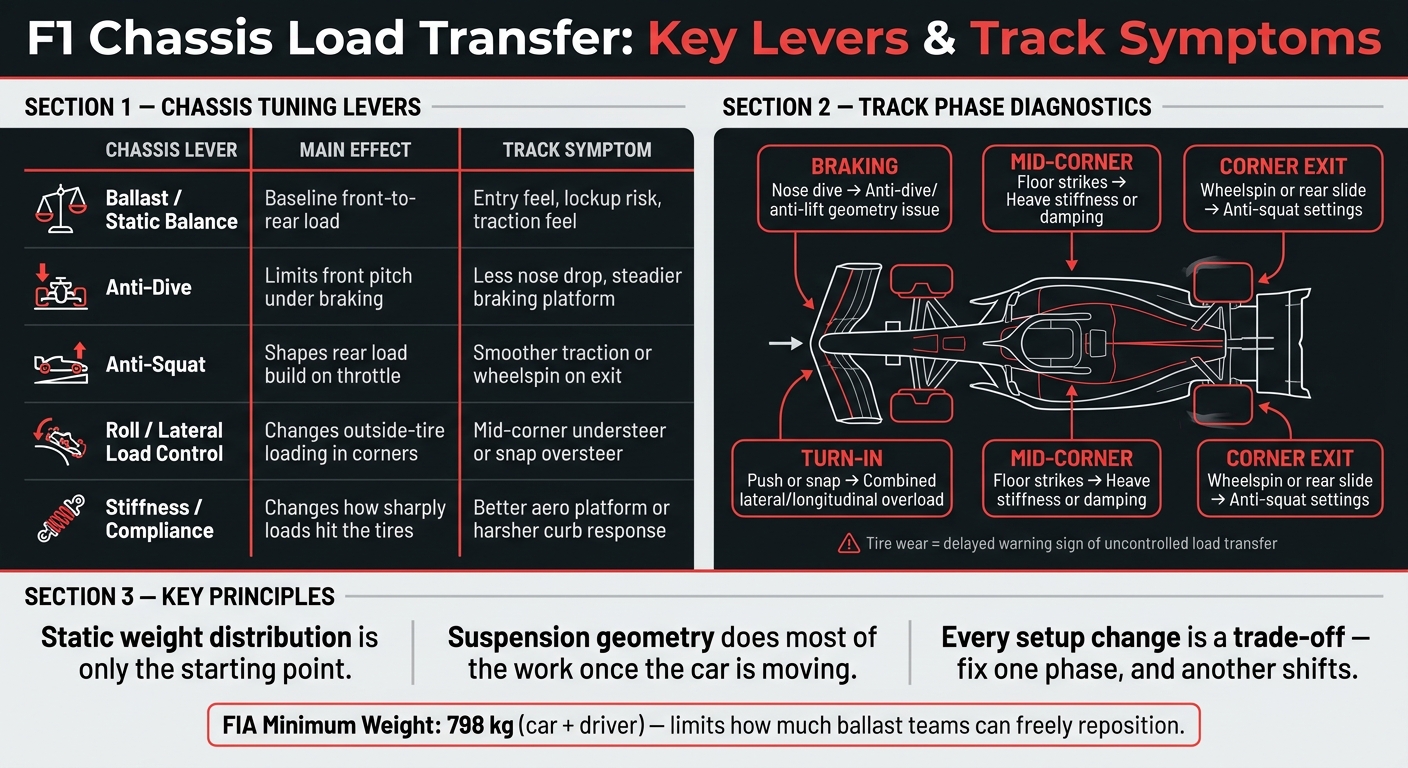
F1 Chassis Load Transfer: Key Levers, Effects & Track Symptoms
Steering With Your Feet | Weight Transfer Explained
sbb-itb-7c68254
The constraints: Why ballast alone cannot fix weight transfer
The FIA sets a hard minimum weight for the car and driver combined: 798 kg as of 2023. That rule matters more than it might seem at first glance.
Yes, teams can shift ballast. But only to a point. Packaging limits and FIA rules leave very little room to move mass around in any meaningful way. The gearbox and monocoque are structural parts that also carry suspension loads, and their locations are mostly locked in by safety rules. The power unit works as a stressed member too, which means there isn’t much free mass left to shuffle front to rear.
That’s why suspension geometry ends up doing the heavy lifting. It’s the main way teams shape how the car behaves once loads start moving around. In plain terms, it controls how much the car pitches under braking, squats under power, and rolls in corners.
So when engineers want to manage load transfer, they don’t just reach for ballast. They lean on anti-dive, anti-squat, and roll center settings instead.
| Tuning Tool | What It Controls | FIA Constraint Level |
|---|---|---|
| Minimum weight | Defines the minimum car-and-driver mass | Strictly mandated |
| Ballast placement | Lowers the center of gravity and adjusts static balance | Limited by packaging and rules |
| Static weight distribution | Sets the car's baseline front-to-rear balance. | Strictly regulated |
| Suspension geometry | Controls dynamic dive, squat, and roll | Primary tuning lever |
Static weight distribution versus dynamic balance
Static setup is locked in before the car moves. Dynamic balance changes every time the driver hits the brakes, gets back on throttle, or turns into a corner.
That difference is a big deal in ground-effect cars. These cars can lose downforce fast when ride height shifts, so even small pitch changes under braking can upset the floor. As James Allison, Technical Director at Mercedes-AMG F1, put it:
"You need to keep the car within a very narrow ride height window, because downforce drops off dramatically as soon as you move away from the asphalt."
That’s the whole problem in one sentence. A few millimeters of pitch under braking can stall the underfloor and wipe out downforce.
Mercedes gave a good recent example of this trade-off. In May 2026, the team brought a new rear suspension spec to the W16 that added anti-lift to steady the aero platform under braking. It worked at tracks with heavy braking zones, including the Canadian Grand Prix. But there was a catch: the setup became harder to manage in long, sweeping corners and in phases where the driver was braking and steering at the same time. By June 2026, Mercedes had gone back to the older spec.
That tension - more stability in one phase, less freedom in another - is what shapes the tuning choices in braking, traction, and cornering.
The chassis design levers that control load transfer
Chassis stiffness and controlled compliance are the main levers here. A stiff platform helps keep the aero platform stable under pitch and roll. But there’s a catch: it can also make the car more sensitive to curbs and bumps.
That matters because chassis stiffness changes how the car reacts when load shifts all at once, not just how it behaves in a steady-state setup.
Chassis stiffness and controlled compliance
Too much stiffness can improve aero consistency, but it can also send bumps and curb strikes straight into the tires. When that happens, contact-patch stability can suffer.
Stiffness and compliance don’t change the total amount of weight transfer. What they change is how sharply that load reaches the tires.
Controlled compliance adds just enough flex in the right places to soak up sharp load spikes. That helps preserve mechanical grip and can limit tire temperature spikes. The target is pretty simple: a platform stiff enough to protect downforce, but not so rigid that it overloads the tires.
You see that trade-off most clearly under braking, on corner exit with traction, and in fast corners where the car has to stay settled without beating up the tires.
Problem-solution analysis: Tuning around braking, traction, and cornering weaknesses
Once suspension geometry and chassis stiffness are locked in, you get to the part that tells the truth: how the car behaves under braking, on corner exit, and through fast turns.
Braking instability and front axle overload
Braking instability usually comes from one of three causes: too much forward weight transfer, brake migration, or aero pitch that upsets the floor. The key is to fix the source, not just the symptom, because each change shifts entry balance in its own way.
Too much forward weight transfer can overload the front axle and make the car feel nervous the moment the driver hits the brakes. Brake migration can move balance in a way that changes how the car rotates into the corner. Aero pitch adds another layer. If the platform moves too much under braking, the floor can lose support right when the driver needs the car to stay settled.
Poor traction and rear tire overheating on corner exit
The same idea carries over to corner exit, where rear load buildup becomes the limiting factor.
Poor traction and rear tire overheating on exit usually point to a rear axle that takes load too suddenly. In plain English, the rear tires are getting hit too hard, too fast. A good first move is to reduce anti-squat so rear load builds more smoothly. That tends to calm the car down and helps the tires do their job without getting cooked.
Small rear-balance shifts can help too, but only if turn-in still feels right. Push that change too far, and you may fix exit while making the car lazy at corner entry.
Fast-corner understeer or snap oversteer from lateral transfer
Fast corners bring out a different kind of weakness: how evenly the car manages lateral load.
If the car understeers at mid-corner, the front tires are reaching their limit first. If it snaps into oversteer, the rear is losing grip too fast as lateral load builds. That’s why these corners can feel fine one lap and nasty the next. The balance window is tight.
Forward bias can sharpen entry, but it also adds lockup risk. Rear bias can help traction, but it may slow rotation. There’s no free lunch here. Every change helps one phase of the lap and asks you to give up something in another.
Conclusion: How chassis design turns weight transfer into lap time
F1 chassis design is all about managing load. Wheelbase, ride height, suspension geometry, and stiffness decide how each tire gets loaded under braking, acceleration, and cornering. And that’s the key idea: these parts work as a system. Change one, and something else moves with it. That’s why setup is always a trade-off, not a perfect fix.
You can spot those trade-offs most clearly in braking, cornering, and traction. If you’re watching trackside, the car usually tells the story.
Key signs to watch for when reading car behavior on track
| Phase | Stable platform | Instability | Likely cause |
|---|---|---|---|
| Braking | Level platform; minimal pitch | Nose dive or excessive pitch | Anti-dive/anti-lift geometry |
| Turn-in | Smooth rotation; front-end bite | Push or snap | Combined lateral/longitudinal loading |
| Mid-corner | Stable, planted ride height | Ride-height instability or floor strikes | Heave stiffness or damping |
| Corner exit | Progressive rear load transfer; immediate traction | Wheelspin or rear slide | Anti-squat settings |
Tire wear is often the delayed warning sign that load transfer isn’t under control.
FAQs
Why can’t ballast alone fix weight transfer?
Ballast can move the car’s center of gravity, but it can’t fix weight transfer. Weight transfer mostly comes from braking and acceleration acting on the car’s mass while it’s in motion.
In the ground-effect era, those same forces also make the car pitch forward and backward. And that matters a lot, because downforce depends on staying within a very tight ride-height range. That’s why engineers turn to suspension geometry, not just static ballast adjustments, to keep those shifts under control.
How does anti-dive affect braking stability?
Anti-dive geometry helps cut down the nose-down motion that happens under hard braking. By limiting pitch, it keeps ride height steadier and stops the front wing from getting too close to the track.
That steadier platform helps keep airflow to the underfloor more consistent, which helps hold onto downforce and reduce the risk of aerodynamic stalls. The result is more predictable braking and better control on corner entry.
Why do setup changes often hurt another phase?
F1 setups are all about trade-offs. Teams need to keep the car in a very tight ride-height window to get the best downforce, so even a small change that helps in one part of the lap can hurt the car somewhere else.
Take suspension geometry. A setup change that adds more stability under braking, like more anti-lift, can make the car feel better on corner entry. But that same change can hurt performance in long corners or under acceleration, because the car is being asked to do different things at different moments.